Pages

Monday, December 9, 2019

Holiday Project - December 2019 Aurifil Artisan Challenge

I'm in denial that it's December, but my calendar insists that it's true.  Eek!!!

This month's Aurifil Artisan Challenge was to make a holiday themed project.  I decided to go out of the box on this one and make drawstring bags.  If you're wondering how this is holiday themed, it's because these bags would be great for reusable packaging for folks that like to retain their special packaging from year to year or as part of the gift itself.  I also love that they aren't necessarily bound to a particular event or holiday just by choosing different fabrics!  Plus, they are super cute, functional, and they can easily be customized to suit the tastes of the recipient.  Just to show how great they could be, I made 8 of them in a variety of sizes and styles.  Two of the bags (the black and blue) were made in non-holiday themed fabric just to show you the project with a slightly different look.

These Lined Drawstring bags are perfect for any holiday, not just the ones in December!

My favorite drawstring bag is Jeni Baker's Lined Drawstring Bag pattern.  She has a free single-size pattern available on her blog, but the paid pattern gives instructions for 8 sizes PLUS instructions for making your own custom-sized bag.  Jeni recently released an expansion pack for the Lined Drawstring Bag that includes a bunch of fun options that include how to turn the bag into a backpack, changing it up to have the accent at the bottom of the bag, a cute mini accent, and even how to make the pattern from a single fabric (plus a few more)!  I love how the bag is lined so that it's pretty on the inside as well as the outside, and the extra fabric improves the durability of the project.

In the interest of full disclosure, I did make a very slight adjustment to the pattern.  I decided to topstitch all of the seams 1/8" from the edge before I assembled the majority of the bag.  So, it isn't actually stitched through all layers, but it looks like it is!  This isn't really necessary or even visible from a distance, but I love the little bit of extra detail that I get when I topstitch in a matching thread.

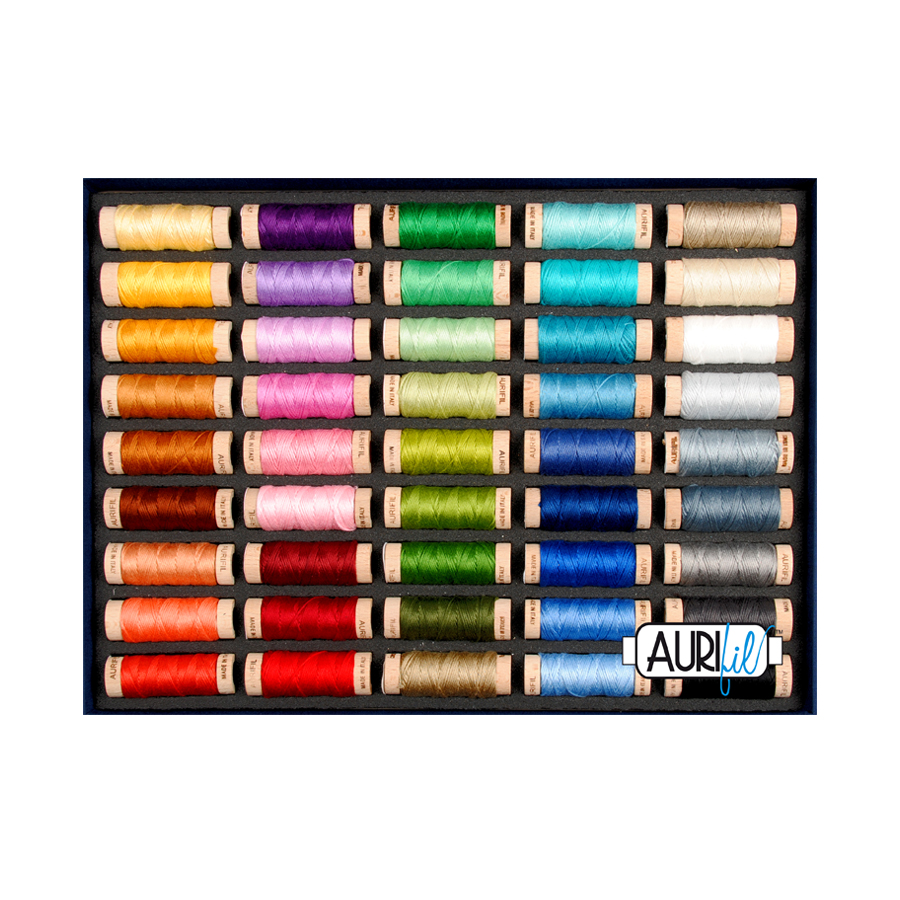
I may have gone a bit overboard with making 8 of them, but they really are a super cool project.  After selecting my fabrics, I decided to use 40wt thread (Aurifil uses green spools for their 40/2 thread) for all of the bags.  The extra bit of thickness it has over the 50wt (the more commonly seen orange spools) makes topstitching and quilting look extra fabulous!

40wt Aurifil thread in colors (L to R): 4020, 5002, 5022, 2021, 4241, 4093, 1148, 1320, 2735

So, without further ado, here's a breakdown of what I made (including which fabrics, thread colors, bag styles, and sizes):

Clockwise from top: 1, 2, 3, 4
  1. Bottom Accent Backpack in Artist Size - Decoupage in Ink, Embroidery in Charcoal, Quilt in Magenta from Handiwork by Alison Glass for Andover using 40wt Aurifil in 4241 (Very Dark Grey) and 4020 (Fuchsia)
  2. Easy Going (2 fabric) in Project Size - Kitschy in Brite and Ornament in Merry from Holiday by Alison Glass for Andover using 40wt Aurifil in 4093 (Jade) and 4020 (Fuchsia)
  3. Mini Accent in DVD Size - Crossed in Fruitcake and Holly in Star from Holiday by Alison Glass for Andover using 40wt Aurifil in 5002 (Medium Red) and 5022 (Mustard)
  4. Bottom Accent in Everything Size - Stripe in Pine, Diamond in Candlelight, and Chorus in Jade from Holiday by Alison Glass for Andover using 40wt Aurifil in 1148 (Light Jade) and 5022 (Mustard)

Clockwise from top: 1, 2, 3, 4
  1. Original bag in Project Size  - Sew in Cobalt and Quilt in Sapphire from Handiwork by Alison Glass for Andover using 40wt Aurifil in 2735 (Medium Blue) and 1320 (Bright Teal)
  2. Original bag in Snack Size - Chorus in Tradition, Holly in Star, and Crossed in Snowflake from Holiday by Alison Glass for Andover using 40wt Aurifil in 5002 (Medium Red), 5022 (Mustard), and 2021(Natural White)
  3. Easy Going (2 fabric) in Tiny Size - Ribbon in Peppermint and Ornament in Merry from Holiday by Alison Glass for Andover using 40wt Aurifil in 4020 (Fuchsia)
  4. Mini Accent in Snack Size - Ribbon in Garland and Holly in Wreath from Holiday by Alison Glass for Andover using 40wt Aurifil in 4093 (Jade)
There are so many great things about this bag and so many ways they can be used.  I've made them to hold my travel sewing machine's foot pedal, but my favorite thing is  to use the Artist size (the size of the black backpack) as a shoe bag when I travel.  It's perfect to hold any of my shoes (I wear a size 9.5-10 in US women's sizes for reference), even my bulky running shoes and my 8-eye Dr Martens boots!  As a comparison, my mom's smaller size (7.5-8) shoes fit in the slightly smaller Project size bag. If it gets dirty, it's easily washable because the bags are made with quilting cotton, and I'm pretty confident that we've probably all washed that before!

So, I'll wrap this post up (get it?? I'm so punny!!) with this - I would like to wish everybody a happy, safe holiday season.  I'll see you back here in 2020!

Monday, November 11, 2019

Travel Handmade - November 2019 Aurifil Artisan Challenge

Happy November!

I'm excited to share my November 2019 Aurifil Artisan project with you.  Our theme for the month is "travel handmade", and nothing says travel handmade to me more than a bag.  I've made quite a few bags that would fall into this category over the years, so I really wanted to make something that I hadn't made before.  After auditing the bags that I like to use for travel and what I needed/wanted to carry, I decided to make ByAnnie's Bowl Me Over 2.0.  It is a purse-sized bag that will be my "personal item" (aka the bag that needs to fit under the seat in front of you) when I fly, but I also like the size of it to use as a regular purse.

Bowl Me Over 2.0 in Skull Camouflage

Annie released the updated pattern at Fall Quilt Market 2019, so it's hot off the presses.  I think what really sold me on making this bag was that the updated pattern included an option to have handles and an adjustable, detachable strap or the original version's long over-the-shoulder straps.  I really like having the option to hand carry a bag, but I also love the flexibility of being able to wear it crossbody or on my shoulder.  This bag gives me the adjust how I'm carrying it based on what works for me at that moment.

With my fabrics selected (Skull Camouflage by Timeless Treasures, Swiss Dot in Grey by Riley Blake, and a black solid), it was time to select thread.  I chose 40wt Aurifil thread in colors 5012 (Dark Green), 2311 (Muslin), and 2692 (black).

40wt Aurifil in colors 2311 (Muslin), 5012 (Dark Green), & 2692 (Black)
When I'm making bags, I like to use 40wt. It is a heavier thread than the 50wt that I use for piecing quilts.  The extra bit of durability is super important especially when you get into larger bags, but I also like how it looks when it is quilted, especially when it is quilted on Soft and Stable, my favorite sew-in stabilizer.  I kicked off the project by quilting a 1" grid before cutting the individual pieces for the bag as the pattern instructs.


A few months ago, I saw an Instagram post with the coolest skull zipper pulls from Emmaline Bags.  Even though I didn't know what I would use them for at the time, I had to buy some.  When I pulled the fabric for my Bowl Me Over 2.0 bag, I knew that this was the right project for them.

Skull zipper pulls + the gunmetal hardware from emmalinebags.com

The bag has some seriously great pockets.  There is a full-sized mesh pocket (instructions are included for making the pocket with mesh or with fabric) + a divided 3-compartment slip pocket on the inside and a magnetic closure flap pocket on the front + a 3/4 height zippered pocket on the back of the exterior.

So many pockets!

Here's what I have in my Bowl Me Over 2.0 bag from my regular purse:  a small wallet, cosmetic bag (it's a ByAnnie small Ditty Bag), glasses case, soft sunglasses case, backup battery pack for my phone, and my car keys.  In addition to the regular bag stuff, I've also added my iPad (which I don't always travel with), my Kindle, a phone cable + power brick, and my somewhat bulky Beats headphones.  I admit that I'm pretty good at making stuff fit in bags (put things in vertically rather than horizontally often makes a huge difference), but this all fit without drama.  There's probably a good 3" or so that is empty when measured from the top of the stuff to the top of the bag.

Yup, it all fits!

Overall, I'm super happy with how my bag turned out.  I haven't had the chance to actually take a trip with the bag yet, but I can tell you that I'm happy with how my travel must-haves fit and how well the bag functions as a purse for normal use!

I'm bowled over by my Bowl Me Over 2.0 bag.  How about you?


If you're curious as to what my absolute favorite bag for travel might be, I'm more than happy tell you all about it!  It's the Travel Duffle 2.0 that is also from Patterns by Annie.  I made the original full-size Travel Duffle pattern back in 2016, and I loved it from the very beginning.  It's a bag that I use quite frequently for trips in the car or for using as my carry-on when I fly (as long as you aren't on a small regional jet or a turboprop, I have had zero issues with the bag fitting in an overhead bin).  When I go to Quilt Market, I usually collapse the bag inside my large suitcase so I have an extra bag if needed.  Who am I really kidding?  Of course I will need to use it!

I decided to make the updated Travel Duffle 2.0 bag in 2018 before I was departing for a quilting cruise to Alaska.  Why?  To be honest, I really wanted to use a specific fabric that I had just purchased.  There was nothing wrong with the original bag, so I tossed it in the washer/dryer and passed it along to my mom before we left on the cruise.

My Travel Duffle 2.0 bag is made with fabrics by Alexander Henry, Timeless Treasures, and Alison Glass for Andover using 40wt Aurifil in colors 1154, 2021, and 2692.
My original Travel Duffle bag is made with fabrics by Katarina Roccella for Art Gallery using 40wt Aurifil in colors 2625, 2692, and 1243.
The pair of Travel Duffle Bags as we waited to be picked up from the cruise terminal.  Mom's duffle is actually turned so that the front is toward the handle of her suitcase.

That's all I have for you today because it's time to get back to making plans for my next sewing project!  Thank you for visiting.

Tuesday, October 15, 2019

2019 #SewPINK Initiative Blog Hop


Hey, folks!  We are basically halfway through October, and it's finally my day to share the project that I created as part of ByAnnie's #SewPINK Initiative blog hop!

Before I get to that, can we talk about the fact that breast cancer is the most common cancer among women in the US according to the Center for Disease Control?  That's pretty significant, and I think it's quite scary.  Mammograms are not on my list of fun things to do, but they are a valuable tool for helping to detect breast cancer early.  In combination with monthly self-exams and being checked by your doctor during your annual well-woman exam, it's worth the few moments of your time.  Please don't be afraid to talk to your doctor about any changes that you may notice.  The chance that it might help to save your life will more than make up for a couple of minutes of a potentially uncomfortable conversation.

Ok, let's get back to the thing you came to see!


To celebrate the amazing strength, bravery, and courage of those women AND men who fight against breast cancer, I made a mini quilt that is ~15" x 20".  I used an amazing pattern from Happy Sew Lucky's Tattoo block series called Courage.  As usual, my insanely talented friend Teresa Silva of Quilting Is My Bliss worked her quilting magic by adding some beautiful custom quilting to give depth, texture, and definition to the piece.  I wanted it to have a little extra bit of oomph, so ByAnnie's Soft and Stable was used in place of regular quilt batting.  Soft and Stable adds a bit of body to the piece and helps to really show off the fabulous stitching.  It's become my go-to "batting" for all of my mini quilts (in addition to being my go-to bag stabilizer)!  If you haven't tried it yet, you really should!


I selected a range of pink and grey solids plus one of my favorite dots for the background just to mix it up a little.  From top to bottom they are:  Designer Solids in Manatee from Free Spirit, Cotton Couture in Ozone from Michael Miller, Polka Dot in Silver from Dear Stella, Kona Cotton in Valentine by Robert Kaufman, Designer Solids in Pink from Free Spirit, and Cotton Couture in Pink by Michael Miller.

The quilt was foundation paper pieced using 50wt Aurifil 100% cotton thread in Natural White (color 2021).  I loved how subtle the grey looked against the quilt, so I also used Ozone for the binding so it would not distract from the design in the center.


I hope you are enjoying the posts from all of my fellow bloggers and the product deals that are currently being offered this month from ByAnnie!  You can find the links with more information about the deals and giveaways below.

I would also like to say a special thanks to the team at ByAnnie for taking BEAUTIFUL photos of my quilt.  You're a star, B!

For now I'll wrap up with a gratuitous close-up shot of the quilting!  I love those swirls!


Custom quilting done by Teresa Silva of Quilting is My Bliss


The #SewPink Initiative was created by ByAnnie.com LLC to raise awareness for breast cancer during October’s Breast Cancer Awareness month. They have pledged to raise funds to donate to the Breast Cancer Research Foundation through sales and to promote action through giveaways.

To see the calendar of events visit: https://www.byannie.com/2019-SewPINK#calendar

For more information please visit the official #SewPINK information page: https://www.byannie.com/2019-SewPINK

To donate directly to the BCRF visit: https://give.bcrf.org/give/31404/#!/donation/checkout

ByAnnie will be donating 30% of profits on all SewPINK items sold at their web store. You can search for SewPINK items on their website or see the list of items here: https://www.byannie.com/index.php?route=product/search&search=sewpink

Find a screening program near you:

Friday, October 11, 2019

More than 5! - October 2019 Aurifil Artisan Challenge

It's a new month, so Aurifil has set forth a new challenge for the Artisans. Our October's challenge is to use more than 5 colors in a project.  While it is quite common for me to use 2-4 thread colors in most of my quilt or bag projects, I don't often exceed that number (except for once which I will tell you about at the end).  The greatest opportunity I have to use additional colors seems to be when I'm doing a hand sewing project.  I've used 7 or 8 colors on an English Paper Piecing project that I never finished (and no, I'm not showing you that because it is NOT good).  LOL.  Cross stitch, my most recent obsession, has become a great vehicle for using a lot of color.

Because it's October and Halloween is one of my favorite holidays, it seemed timely to make this super cute Vintage Black Cat pattern by Not So Modern Millie (be warned that the stitch chart is only in B&W at the time of this post, so dig out some colored pencils because you may want to color it in).  I've used 8 different colors of Aurifloss, and I'm really happy with how it turned out.

Aurifloss colors from L to R: 1135, 1147, 1133, 4030, 2610, 2600, 2021, 2692

And because I couldn't stop there... what do you get when you find a pattern that would make a perfect gift for a friend and it has more than 5 colors?  That's right!  You get a second Aurifil Artisan project for October!

Aurifloss colors from L to R: 1114, 2892, 1100, 2479, 2105, 1246, 2692
"You Can't Make Everybody Happy. You're Not Tequila" (pattern from @stephxstitch) is the first cross stitch project that I have gifted to anybody.  Thankfully, the gift was a total success and  my tequila loving friend was THRILLED (here's the proof)!  I used 7 colors of Aurifil's Aurifloss to complete the project.  Once it was stitched, it got a quick bath in Soak wash before getting pressed,  hooped, and mailed.

I would be remiss if I didn't at least mention my personal all-time record for the number of thread colors used in a project.  For that we need to rewind and go back to the Sewology quilt that I finished in September 2018.  I pieced the twin-sized quilt top with 18 colors of thread - 17 are 50wt cotton and clear monofilament.  Yes, really!  It seems pretty crazy to do that, right?  Perhaps it is, but if you've ever pressed seams open on a quilt, you may have noticed that you can sometimes see little dots of your piecing thread between the fabrics.  I absolutely didn't want that to happen on this quilt, so I went a little overboard (and my little thread loving heart thoroughly enjoyed the challenge).  I matched thread to the fabrics that I would be using in each block.

Thread colors (2230, 2021, 5004) matched to fabric picks for the Seam Ripper block
The 12 block quilt was originally released as a block of the month program from Pen and Paper Patterns, so I was working in small amounts.  35 fabrics from the Kaleidoscope collection by Alison Glass for Andover and 18 thread selections later, my top was finished and off to be custom quilted by Teresa Silva of Quilting Is My Bliss.

Photo by @pinkdoorfabrics
Do I actually think it was necessary to use as many colors as I did?  Absolutely not, but if you've got 'em, why not use them?  LOL.

That just about wraps up everything I've got for you today.  I'm off to sew something, and I hope you are too!  Thanks for visiting!

Tuesday, October 1, 2019

October is Breast Cancer Awareness Month + ByAnnie's New #SewPINK Initiative (and Blog Hop!!)

I wanted to pop in and take the opportunity introduce you to a special event during the month of October.  My friends at ByAnnie.com have launched the #SewPink (note that not all posts with that hashtag may be related to this specific event because that's just how Instagram rolls) initiative to help raise awareness for breast cancer and to raise money for the Breast Cancer Research Foundation.

I am very proud to have been selected to join a group of bloggers that have been tasked with creating something to share with all of you.  You can find out more information about the event by following the links below, including a calendar so you can see the list of participating bloggers.  Be sure to come back here on Tuesday, October 15 when I unveil my project.  I will be posting pics on my Instagram account, but you will be able to read more about it here!


The #SewPink Initiative was created by ByAnnie.com LLC to raise awareness for breast cancer during October’s Breast Cancer Awareness month. They have pledged to raise funds to donate to the Breast Cancer Research Foundation through sales and promote action through giveaways.

For more information please visit their official #SewPINK information page: https://www.byannie.com/2019-SewPINK

To donate directly visit: https://give.bcrf.org/give/31404/#!/donation/checkout

To see the calendar of events visit: https://www.byannie.com/2019-SewPINK#calendar

ByAnnie will be donating 30% of profits on all SewPINK items sold on their web store. You can search for SewPINK items on their website or see the list of items here: https://www.byannie.com/index.php?route=product/search&search=sewpink

Wednesday, September 11, 2019

Adventures in Cross Stitch - September 2019 Aurifil Artisan Challenge

Have you ever woken up one day and decided that you wanted to try a new hobby?  I've done that more than once.  That's how I started sewing, and now I've done it again with my latest obsession - cross stitch.

Cross stitch seems to be making a comeback as a hot new hobby, and I am super excited to see what designers are releasing.  From the snarky (my favorite) and profanity-laden to traditional designs, there's basically something for everyone.  

This year's batch of Aurifil Artisans have been invited to participate in challenges.  Each month has a different theme, and September is all about embroidery and cross stitch!  Of course that means I couldn't resist signing up to participate.  Without further ado, here's my featured project:


For this project, I used a design by Subversive Cross Stitch with Aurifil's 100% cotton floss (aka Aurifloss) in colors 2692 (Black), 2250 (Red), 2870 (Green), and 2120 (Canary).  To give it a bit of extra flair, I used some tiny sew-in rhinestones that I ordered from Subversive Cross Stitch's online shop.  I was so happy with how the design came out that I decided to get it professionally framed! p.s. If you really want to go the extra mile when you're having something framed, I highly recommend using Museum Glass.  It's a more expensive option, but it gives great UV protection and there's basically no glare.


I am a big fan of Julie from Subversive Cross Stitch (WARNING: some of the designs do have bad words, so it may be best viewed when not at work or when children are present) because her designs probably aren't what you expect to see when you hear "cross stitch."  If you follow me on Instagram, you've already seen several of her patterns that I've stitched out, but I've shared a few of them at the bottom of this post for your viewing enjoyment (none have bad words).

While you can do cross stitch with a couple of different thread options, I've been using Aurifloss, Aurifil's 6 stranded 100% Egyptian cotton floss.  Each wooden spool has 18 yards of floss, and all 270 of Aurifil's colors are available (with the same color number as the other cotton weights).  I've been 3 strands with 14 count Aida cloth (as recommended by Aurifil), and it's worked very well.  As always, I would recommend to test on a scrap piece of cloth and see if you are happy with how things look.

When I decided to try out cross stitching, I ordered a small collection called Flossie.  The Flossie box has 5 small spools of floss in an assortment of colors that would work great to get me started on my adventure.
Image courtesy of Aurifil
After a few projects, I knew that I was totally hooked, so I knew that I would want more colors to choose from.  Enter the Best Selection 2018 collection.  With 45 spools in a lovely range of colors, my little thread-loving heart was bursting with joy and with excitement for all of the fun things that I plan to make.
Image courtesy of Aurifil

Other than Aurifloss, my other cross stitching essentials are a Q-Snap frame (I mostly use the 8"), a small pair of scissors, 14 Count Aida cloth, and tapestry needles (I'm still trying to find which I like most, but I've been pretty happy with size 24 John James Tapestry Needles).  You'll also want to have good light.  I use a Stella Sky lamp next to my living room couch that is great for when I'm cross stitching or binding a quilt.  The Daylight Company also has some good floor-standing options.  I have several of their lamps that I use on a daily basis, but they are mostly tabletop which isn't ideal if you don't have a table next to the couch to put them on. ;)

Here are a few other work-appropriate cross stitch projects that I've made with Aurifloss (information on colors used is included).


Spark Joy Or Get Out pattern from Subversive Cross Stitch made w/ Aurifloss colors 2692 (Black) & 2545 (Medium Purple)

A Cat Is An Angel That Poops In A Box pattern from Subversive Cross Stitch made w/ Aurifloss colors 2692 (Black), 2610 (Light Blue Grey), 2423 (Baby Pink), 2140 (Orange Mustard), & 2815 (Teal)
So, that's it from me because it's time to go sew!

Saturday, August 24, 2019

Juniper Blog/IG Tour

Hi there

Welcome to my stop on Jessica VanDenburgh's Instagram/blog hop for her new line with Windham Fabrics, Juniper!


From snails and dragonflies to tiny, adorable mushrooms, Juniper is a sweet, whimsical collection.  You can check out the full collection on the Windham Fabrics website in more detail here.


To show off the collection, I opted to make a set of all 5 sizes of the Clam Up bag pattern from ByAnnie. The pattern makes a great gift, and it's quick to sew!  Another reason I love this pattern is because it includes instructions for using quilted fabric, un-quilted fabric, and for using Slicker, a fusible vinyl product to give the bag an easy-to-wipe clean interior.  I chose to quilt the fabric using a 3/4" grid set at a 45 degree angle which should probably come as no surprise to anybody that might follow me on social media.  LOL.  The simplicity of the grid quilted on the ByAnnie's Soft and Stable foam stabilizer is super for adding texture without distracting from the prints or colors of the fabric.  40wt Aurifil thread is my thread of choice to add the perfect blend of strength and texture.  With 270 colors and multiple thread weight options, I love how I can find the right thread for my projects with Aurifil.

Yes, I really did use all of these colors!
Without further ado, here's a pic of each bag that includes the part # for the fabrics and the colors of 40wt Aurifil thread that I used:

Extra Small - 51318-2 and 51918M-3 with Aurifil colors 2311, 2435, 2520
Small - 51315-3 and 51317-7 with Aurifil colors 2311, 5002, 2423
Medium - 51318-1 and 51319M-9 with Aurifil colors 2783, 1320, and 1231
Large - 51316-4 and 51317-6 with Aurifil colors 2311 and 1148
Extra Large - 51314M-1, 51315-2, and 51315-1 with Aurifil colors 2783, 1320, and 4225

And look how adorable the Clam Up bags look when nested together!
Thanks for spending some time with me today.  I hope you enjoyed seeing how I used Juniper, the new collection by Jessica VanDenburgh of Sew Many Creations for Windham Fabrics, and I hope that you will check out all of the other super awesome makers that are participating!  Jessica is giving away a fat quarter bundle of Juniper to one lucky winner.  You can find out more info on how to enter by following the instructions on Jessica's first post for the tour (August 18).

Here's the full schedule :

August 18 - Jessica VanDenburgh @sewmanycreations
August 19 - Shayla & Kristy Wolf  @Sassafraslane
August 20 - Natalie Crabtree @njcrabtree
August 21 -  Nikki Maroon @thegirlwhoquilts
August 22 - Lee Chappell Monroe @maychappell
August 23 - Heather Givans @crimsontate
August 24 - Leslie Meltzer @lelliebunny - YOU ARE HERE! :)
August 25 - Tammy Silvers @tamarinis
August 26 - Tiffany Sepulveda @sewtiffany
August 27 - Alison O'Grady @sewbeeitclothier
August 28 - Kate Colleran @seamslikeadreamquilts
August 29 - Jamie & Jill @Sunflower_quilt
August 30 - Sherry Shish @poweredbyquilting
August 31 - Linda & Carl @colourwerx
September 1 - Karen @LadyKQuilts 
September 2 - Stephanie Soebbing @quiltaddictsanonymous
September 3 - Jessica VanDenburgh @sewmanycreations

Thursday, July 11, 2019

It's time to make a choice...of thread colors!

I'm selecting thread today for an upcoming project, so I thought this would be a good opportunity for me to share more about the way I go about picking colors.

For basic quilt piecing as a general rule, I will often piece in a neutral thread, such as a light grey (Aurifil 2600) or white (Aurifil 2021), that will blend in with most of the colors of the quilt top.  Depending on the project, sometimes that "neutral" is anything but neutral.  When I'm going to work on a project where the thread will be entirely visible, such as quilting or topstitching on a bag or garment, I get a little more picky on what I use (this is a massive understatement).  ;)

I like to select thread weights and colors before each new project so I can have the right thread on hand and ready to go when I need it.  My process usually starts with comparing the fabric (or zippers/mesh/ribbon) with my trusty Aurifil color card. If I'm torn between a couple of colors or if one isn't quite a perfect match, I will grab a couple of options and go from there.

Based on what I see next to the color card, I would pull color 2588 as a likely match to coordinate with the fabric.

I recommend color cards that have actual product on it when possible for thread or fabric. Purchasing the color cards have saved me a ton of time and money when I need to order online or simply if I can’t remember exactly which solid fabric I used.  In a pinch, I've used pre-printed swatches, but they aren't usually as accurate as the real thing. I wrote a blog post about color cards and DIY versions a couple of years ago that is still applicable, so here's the link.

From there, I pull the colors and unwind a few inches from the spool to see if I like the match or not (this also gives me a chance to see if I need to order more).  If you happen to be thinking, wow, you person must have a lot of thread, please also remember that I have been using Aurifil since 2013, so I've amassed a pretty good stash of colors.  I really do have a lot of thread, but it wasn't purchased at one time.  :)

It's a little hard to see, but the grey thread is spread out over several of the colors so I can see if I like how it looks.

If I unwind a bit and I'm still unsure, I will actually take a small scrap of the fabric and stitch a line of each thread to see how it actually works.  Sometimes you just do what you gotta do, right? ;)  If I am pleased with the color but I think it needs a bit more or less texture, I may decide to use a different thread weight.

One of my favorite things about Aurifil’s cotton thread is that that the color numbers are consistent across the weights, including floss! So, if I have the right color in the wrong weight (i.e. I have it in 50wt, but I want 40wt for my project), I can order with confidence that I’m getting the right color. That makes me super happy (and reduces my stress level)!

As a side note, I also record the colors that I use with each project so that I don't necessarily have to go back through the whole process if I'm using the same fabrics in another project.  :)

Well, that's basically it.  Now it's time to order one spool of thread for my upcoming project so I can get started!

Friday, June 7, 2019

Pattern Review - Wander Skirt by Gentle Clothing

I realize that it's been ages since I wrote my last review of a pattern, but this seemed like a good one to write about.  So, here are my thoughts on the Wander Skirt by Karen LePage of Gentle Clothing (Instagram: @gentleclothing).

In the interest of full disclosure, Karen and I are friends.  We were introduced by a mutual friend after Karen moved to the Pacific Northwest.  I received a copy of the pattern from Karen after I had expressed interest in making it.  She did not ask me to write a review or anything of that sort in exchange for the pattern.  This review is based on my honest experience with making the pattern.

Now that I got that out of the way, are you ready to hear what I think about it?  GOOD!  Let's go!

I wouldn't really consider myself a garment sewist.  I've made a few pieces, but mostly I find something that I like and then I make it a few times as I've done with my favorite t-shirt pattern, favorite cardigan, and PJ shorts/pants.  I can literally count the number of skirts that I own on one hand (and not even get through all of my fingers), so this pattern was pretty out of the box for me.  I've had issues with wrap-style items being a little scary when a slight breeze happens, but Karen showed me how this skirt was different in terms of overlap.  She was right (and I even experienced some pretty substantial wind while wearing the skirt, so I can personally attest to it).

The first thing that caught my eye about the pattern (when I saw pictures on Instagram) was that it can be made with a variety of different fabrics.  Some of the fabrics mentioned as suitable for making the skirt include: cotton lawn, quilting cotton, linen, and denim.  Perfect!  Right after I saw how cute it was, I read that it was reversible!  YES!  That's even better!  I decided to use fabrics from the Observatory collection by Alison Glass for Andover Fabrics for the main and contrast.  The fabrics in the collection are created by hand using the batik process, but they don't feel like most batiks (which is probably why I like them).  Just to mix it up a little, I decided to make the waistband/tie out of my favorite print from Alison's Adorn collection.  The one that I selected is a cotton lawn.

Fabrics are from Observatory by Alison Glass for Andover Fabrics
With fabrics in mind, I moved into selecting a size - not my favorite part of any pattern.  There are 11 sizes included, so it is designed to work for lots of bodies.  The pattern also gives some tips on selecting sizes, fitting tips, and options for variations including length modifications and widening the waistband (p.s. I did not make any modifications on mine).  Perfect.  I picked one and off I went to trace my pattern onto Swedish tracing paper while my fabrics were in the washing machine.  Don't forget this step (if your fabrics can be laundered) because fabric will often shrink, so it would be a real bummer to make a finished garment then wash it and have it not fit in the end.

I found the instructions on laying out the pattern pieces to be easy to follow.  I can never seem to remember which color is which (right or wrong side) on garment pattern illustrations, but thankfully, the pieces were labeled in the illustrations.  YAY!  After I got all of the pieces cut, I interfaced the waistband/tie (because it recommends to do so when you're using a lightweight fabric) using Palmer Pletsch PerfectFuse Interfacing in Sheer weight to give the lawn a bit of body and to try to minimize the wrinkling.

Construction of the skirt was straight forward (and it's made using a straight stitch on a sewing machine - no serger required).  The only tricky part was trying to figure out exactly where I needed to create the pass-through hole for the tie, but once I wrapped the skirt around my body, I understood where it needed to go.  To be honest, the pattern illustration was spot on.  I just got a little paranoid that I would put it in the wrong spot.

I love the topstitching along the bottom edge in 40wt Aurifil colors 2692 and 1200
With that crisis averted, I finished my skirt.  I washed it and packed it before I left for a trip to Kansas City where I wore it, and then I wore it a few days later with the reverse side out!  Yes!  I really did.  Here are a couple of less than ideal pictures that I snapped in my hotel room (the cardigan is Universal Standard for J.Crew if you're wondering):

I wore it first with the purple (contrast) side out to a trunk show 
Then I wore it with the black (main) side out  a few days later
A better pic of my completed skirt where you can see the colors.  40wt Aurifil in color 2630 was used for the waistband/tie
This pattern is very well written.  Karen's years of sewing and pattern writing expertise are evident.  She's made this skirt a ton of times.  She's worn this a ton of times.  She's taught this pattern as a class a ton of times.  I do believe it really is suitable for a person for a confident beginner sewist or even a quilter (who has sewn for years but never made garments)!  LOL.

So, I've made the skirt.  I've worn it.  It's a skirt, and I liked it (yeah, for real).  I think I'll even make another one...or two.  Would I change anything on the next one?  I think the only thing I may change the next time I make it is to make the waistband/tie a little bit longer so I can have a longer bow, but that's it.  It's not an issue with the skirt.  It's just personal preference.  It was super windy on the second day that I wore the skirt, but it did not let me down.  Everything under the skirt stayed under the skirt (and aren't we all thankful for that?)!  I even sat cross-legged on the floor while wearing my Wander Skirt without any exposure/incidents/issues (take your pick of word).  YES!  YES!  YES!  I'm a happy camper.  :)

There's only one thing that I wish it had...pockets.  :). Maybe that's a suggestion for a future pattern!

Tuesday, May 21, 2019

Anna Maria Horner + Aurifil Showcase!


Hey!  I'm super excited to finally be able to share my project for the Anna Maria Horner (Instagram: @annamariahorner) + Aurifil (Instagram: @aurifilthread) Showcase featuring Anna Maria's beautiful Passionflower collection for FreeSpirit Fabrics (Instagram: @freespiritfabrics)!

Let's get the basics out of the way, and then I'll share more details (plus a few tips)!


Fabrics from Passionflower:  Imposter in Medieval, Migration in Dahlia, & Passiflora in Silver

Thread:  Aurifil 40wt in 1248 (Dark Grey Blue), 2479 (Medium Orchid), & 4241 (Very Dark Grey)

Pattern:  Easy Does It from ByAnnie (Instagram: @patternsbyannie)

For this project, like many of my others, I wanted to match the thread color to the fabric so I added in a few extra colors. :)  My favorite thread for quilting, making bags, and binding is Aurifil's 40 weight Mako Cotton (I do my quilt piecing in 50wt Aurifil).  The 40wt thread is a little more beefy, so it adds definition to the stitches without dominating. When selecting thread, don't forget to choose a needle that is appropriate for the thread and fabric that you are using because it really does make a big difference.  Here's a link to a Aurifil's Product Guide which lists recommendations for needle types and sizes based on the thread weights.

If you've been with me for at least a few posts (or if you follow me on Instagram), you have probably noticed that I have a bit of an affinity for grid quilting, especially when the quilting is set on point.  There is such a beautiful simplicity to it, and it is a great way to add texture without distracting from either the fabric or the pattern.  With the size of the bag and the scale of the prints, I decided to go with a 3/4" grid (I usually use grids between 3/4" and 1 1/4" depending on the project).  I quilted the fabric to the ByAnnie's Soft and Stable® and cut the pieces to size as instructed.

When I am quilting a grid, I like to actually mark the lines rather than using the guide that I can attach to the foot on my machine.  Clover's #5032 Air Erasable Marker (Instagram: @cloverusa) is my favorite tool for most fabrics.  Please note that you should ALWAYS test your fabric + marking tool combo to make sure that you get the intended result.  I love this specific marker because the ink will disappear on its own,  or they can be removed immediately with water using either the eraser on the pen or a spritz of water from a spray bottle.  Factors like temperature and humidity may impact how long the marks will stay, so I like to mark a couple of lines at a time then quilt them right away.  Whenever possible, I also prefer to mark on the lining side of the fabric just to be extra safe.

I find that I have the best results with my quilting if I use a walking foot and a longer stitch length.  The walking foot helps the fabric to move as one unit because pressure is applied from the top and the bottom at the same time.  When using different colors of thread in the top and bobbin, I am extra particular about my thread tension.  If I am sewing with the lining side up, I will often increase the TOP tension VERY slightly (basically the smallest amount that I am able to adjust) so the stitches on the main/exterior fabric look perfect.  The tiny adjustment still allows for the threads to meet in the middle of my "quilt sandwich", but it gives it a nudge toward the lining.  I will fully admit that the change isn't something that most people would notice because it looks excellent without any adjustment, but it's still something that I do.  Maybe try it and see if you think it makes a difference.

Quilting on marked lines with the lining fabric face up in 40wt Aurifil 2479
After I've marked a few diagonal lines (I line up the 45 degree line on my ruler with the bottom edge of the fabric to make it easy for the first line then I use that as a guide for the other marked lines) for my stitching, I start sewing by working from the center toward the edge.  Once that side is complete, I work out to the other edge starting from the center again.  After all of those parallel lines have been quilted, I place my ruler across the piece perpendicular to the sewn line and mark a couple of lines and repeat the process until it's all finished.  If you look closely at the lower left section of the picture, you will notice that the grid is not yet complete.

Main/exterior fabric quilted with Aurifil 40wt color 1248
Remember, this is the side that was underneath when I was quilting (I used the Dark Grey Blue as my bobbin thread).  It looks pretty great, don't you think?

The Easy Does It is a free pattern from ByAnnie (featured in Issue 6 / 2019-2020 catalog) was designed to use 3 fat quarters, so it was great for this challenge.  I love the size of the bag, and I think it would be great for a variety of skill levels especially with their free Add-On Video (the link should be active soon)!

Just to wrap up, I've got a couple of extra pictures for you!

The finished bag interior.  I love the bound seams!

What could be cooler than getting a picture of my finished project with the amazing Anna Maria Horner at Quilt Market?!?!

So now that I've spilled some of my secrets, I hope you may find some of the information helpful!  Much thanks to the wonderful folks at Aurifil and FreeSpirit for providing the fabric and a spool of thread to those of us that participated in the Anna Maria Horner Showcase.  I am so happy to have the continued opportunity to work with Aurifil as I am a returning Aurifil Artisan for 2019-2020!

p.s. (and a reminder to my future self) - lint rollers are only useful if you don't forget to use them to get all of the little bits of charm pack floof out of the interior of your bag before you take a picture!  Oops!

p.p.s. I made the skirt that I'm wearing in the picture with Anna Maria!  It's the Wander Skirt pattern by Gentle Clothing (Instagram: @gentleclothing).